article number
968878

Brodit houder/lader Symbol MC70/MC75 sig.plug

Price €101.96
In stock
-
+
  • Fast Shipping
  • High Quality Products
  • Secure Payments
Details
The active holder charges your battery when it is in the holder. The charging device connects to the PDA automatically when you put the PDA in the holder. The holder is attached onto a tilt swivel and can be adjusted in order to avoid light reflection. Connects to the vehicle’s cigarette lighter socket, 12/24 Volt. The holder fits devices both with standard and extended battery. Attach onto ProClip Mounting Platform.
 
Charging specifications:
Input voltage: DC/10-24V
Charging voltage: DC/4.6-5.3V
Output current(Typ): 3.0A
Input & output protection: Input polarity reversal/Output over voltage/Output over current/Output short protection
LED charging indicator: Product output indicator
Operating temperature: 0°C ~ +40°C
Storage temperature: -20°C ~ +80°C
RoHS compliant: ROHS
More Information
More Information
Accessory brand Brodit
Barcode 7320289688786
Recommended retail price incl. VAT €101.95
Device with or without case without skin
Holder feature Toestelspecifiek
Cable / Qi / charger type / connnector Cable fixed sig plug
Input Voltage 12/24V geschikt
Voltage (output) 4.6 - 5.3V
Max Amperage 3,0 Amp
Montage standaard AMPS
Device holder lockable? no
Color black
Productinfo Professional holder with swivel mechanism for your smartdevice. Adjusting holder angle deminishes annoying screen reflection
Product installation Mount the holder on a ProClip in your vehicle. A detailed installation manual is included in the product packaging
Product suitable for In the Compatibility tab, check whether your smartdevice is suitable or listed for this holder
Item Returns This item can be returned
Show more + Show less -
Compatibility
Show more + Show less -
Instruction
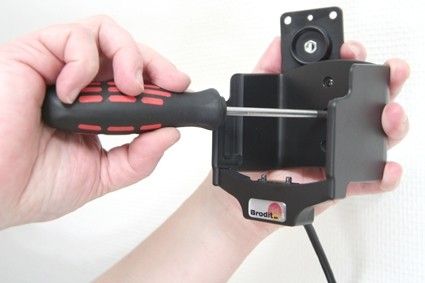
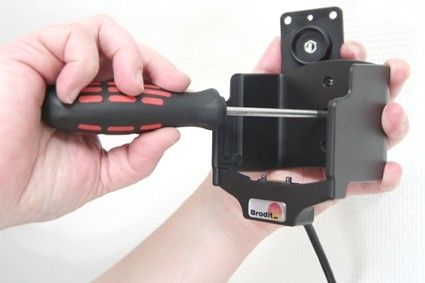
Please read all of the instructions and look at the pictures before attaching the holder.

1. Loosen the screw in the center of the holder so you can remove the attaching part on the back.

2. Place the attaching part on desired position. Screw the attaching part into place with the enclosed screws.

3. Place the holder over the attaching part. Screw the holder onto the attaching part.

4. The holder is in place.
Scroll to top